Sunday, May 8, 2011

Datatable

Usage of datatable
 
Use the DataTable.Value method to access data from the data table and input it into the application
For data in the Global datasheet:QTP and Excel
1. Open a new script.
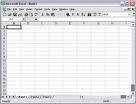
2. In column A of the Global datasheet, enter the data in three rows.
3. Go to www.google.com.
4. Begin recording.
5. Type a value into the Google search field.
6. Stop recording.
7. Go to the Expert view. Modify the script so it look like this:
rc = DataTable.Value ("A", dtGlobalSheet)
msgbox rc
Browser("Google").Page("Google").WebEdit("q").Set rc
8. To run all rows in the global data table, go to Test ->; Test Settings -> Run tab, and select "Run on all rows."
For data in the Local datasheet:
1. Start a new script.
2. In column A of the Action1 datasheet, enter the data in three rows:
3. Go to www.google.com.
4. Begin recording.
5. Type a value into the Google search field.
6. Stop recording.
7. Go to the Expert view. Modify the script so it look like this:
rc = DataTable.Value ("A", dtLocalSheet)
msgbox rc
Browser("Google").Page("Google").WebEdit("q").Set rc
8. To run all rows:
  1. Right-click on the Action name in the Tree View.
  2. Go to Action Properites -> Run tab, and select "Run all rows."

Similarly, How can we use the data table to get output data from an application?

Create an Output Value. The text will be placed in the datatable and can be accessed as needed.
1. Once you see the text you want to retrieve, start recording.
2. From the Insert menu, select Output Value, then Text Output Value.
3. Click on the desired text. The "Text Output Value Properties" window will appear.
4. In the window you can verify or set the Before and After text settings.
5. By default the retrieved value will be added to the Global sheet. You can modify the settings by selecting Output Text in the combobox, then clicking Modify.
6. Once satisfied, click OK.
An Output statement will be entered into the script.
Example:
Browser("Browser").Page("Page").Output CheckPoint("Text")
msgbox DataTable.Value("PageOutput_Text_out", dtGlobalSheet)
In addition, a column (in the example, PageOutput_Text_out) will be inserted into the datatable(Remember in the runtime datatable), with the output text.
OR Another method to retrieve data during run time is to do just the opposite of what we did above in the first question above.
DataTable.Value(ParameterID [, SheetID])=NewValue
Note:
The value property is the default property for the DataTable object. As the default property you do not need to explicitly use .Value.
DataTable(ParameterID [, SheetID]) = NewValue
Example:
' Add data to the current row of the Global sheet
DataTable("VarName", dtGlobalSheet) = "new value" ' Using DataTable by itself
DataTable.Value("VarName2", dtGlobalSheet) = "new value2" ' Using .Value
' Add data to the current row of the Local sheet
DataTable("VarName", dtLocalSheet) = "new value" ' Using DataTable by itself
DataTable.Value("VarName2", dtLocalSheet) = "new value2" ' Using .Value

Friday, May 6, 2011

Sample Code for conditional statements

'Sample Code for conditional statements

a=10
b=20

If a<b Then
    reporter.ReportEvent micPass,"Condition Check","A is less than B"
Else
     reporter.ReportEvent micFail,"Condition Check","B is less than A"   
End If


d=0

For i= 1 to 10
    d = cint(d)+cint(i)
Next

msgbox d


a=0
j=0

While A <=10
    j= cint(j)+ A
    A = cint(a)+1
Wend

msgbox j

'CODE FOR EXECUTION OF COMMAND PROMPT STATEMENTS

'CODE FOR EXECUTION OF COMMAND PROMPT STATEMENTS

Set oshell = createObject("wscript.shell")

oshell.run "cmd /k Net start > c:\services.txt"               'Creates a text file in C:\
oshell.run "cmd /k dir > c:\Dir.txt"                                    'Creates a text file in C:\

Set oshell=nothing

Tuesday, March 15, 2011

Scheduling QTP Script Execution during Out of office

Do you Want to run your QTP scripts when you are not in office/ infront of the computer? Please follow below steps....

1) Create a .vbs file to launch QTP with required settings, add-ins etc.
Here is a sample vbs code
Set App = CreateObject("QuickTest.Application")
App.Launch
App.Visible = True
App.WindowState = "Maximized" ' Maximize the QuickTest window
App.ActivateView "ExpertView" ' Display the Expert View
App.open "C:\Program Files\Mercury Interactive
\QuickTest Professional\Tests\Test1", False  'Opens the test in editable mode

2) ok, for the first timers. Create a sample QTP test and save it as Test1 at the location above. Copy the code into notepad and name the file as testing.vbs 3) Now we will automate the opening of vbs file through Windows Scheduler. Go To Start > Control Panel > Schedule Tasks > Click Add Schedule Tasks Click Next on the screen.
4) Click Browse and and select the .vbs file you just created.You will get this screen
 5) Give a name to the task and select the frequency for performing the given tasks. For this demo we will select "One time only"
 6) Select Start Time and Start Date. For this demo, select Start Time as current time+5 mins and Start date as todays date.
7) Next Screen Enter "UserName", "Password" and "Confirm Password" Click Next and you should get this screen. 
8) Click on Finish and yay, you're done.
Note: The steps above are for Windows XP and may be different for other Operating Systems.

Please feel free to comment on this if any questions.

Tuesday, February 22, 2011

Clicking on all links of Google Search

browser("micclass:=Browser").page("micclass:=Page").webedit("name:=q").Set "QTPPRABHAKAR"
browser("micclass:=Browser").page("micclass:=Page").webbutton("name:=Google Search").Click
browser("micclass:=Browser").Sync
Set oDesc=Description.Create
oDesc("micclass").value="Link"
set lnkList=browser("micclass:=Browser").page("micclass:=Page").childobjects(oDesc)
Set oDictionary=createobject("scripting.dictionary")
For i=0 to lnkList.count-1
    oDictionary.add i,lnkList(i).getROproperty("name")
Next
   LnkProperties = oDictionary.Items
  
For i = 0 To oDictionary.Count -1
   
    If i=oDictionary.count-1 then
        Exit for
    End if
   
    If LnkProperties(i+1)="Cached" Then
        browser("micclass:=Browser").page("micclass:=Page").Link("name:="&LnkProperties(i)).click
        browser("micclass:=Browser").Back
        browser("micclass:=Browser").Sync
    End If
Next

Use of .INI file in QTP

Use of .INI file in QTP

It's used to store user defined external environment variables in 5x and 6x versions of QTP.
Because
of the increased XML usage in all technologies from 8x, QTP is given
a facility to store user defined external environment variables in XML
files. QTP is having backward compatibility so that it will support
.INI files in latest versions of QTP.

How to store environment variables in INI files?

step1: open a notepad file
step2: on top of the file write [Environment]
step3: specify variable names and values
step4: Save it as .ini file
step5: Associate environment file in QTP 
File-->Settings-->environment-->User Defined

EX:-
'************************************************************
[Environment]

URL=www.google.com
ScriptsPath=D:\AutomationProject\

'************************************************************

Creating Comments and Action Template

Creating Comments and Action Template

While editing your test, you can add comments in the Keyword View or in the Expert View. You can also add comments to function libraries. A comment is an explanatory remark in a program. When you run a test, QuickTest does not process comments. You can use comments to explain sections of your tests to improve readability and to make them easier to update. You can add comments directly to the Keyword View or the Expert View, or you can use the Insert Comment dialog box. You can also modify comments at any time directly in the Keyword View or the Expert View, or using the Comment Properties dialog box.

To add a comment in the Keyword View: 

If the Comment column is not visible, right-click any column header and select Comment.

  • To add a comment on the same line as a step, select the step and type your comment in the Comment column.
  • To add a comment on a separate line, select a step and choose Insert > Comment, or right-click a step and choose Insert Step > Comment. The Insert Comment dialog box opens. Type a comment and click OK. A comment statement is added to your test.
To add a comment in the Expert View or a function library: 

Type an apostrophe (') or use "rem" statement and then type your comment. You can add a comment at the end of a line or at the beginning of a separate line.

Example:

'This is a demo test

or
rem this is a demo test
ctrl+m and ctrl+shift+m are the key board short cuts to comment and uncomment a single or bulk statements.
If you want to add the same comment to every action that you create, you can add the comment to an Action Template.

Creating an Action Template
If you want to include one or more statements in every new action in your test, you can create an action template. For example, if you always enter your name as the author of an action, you can add this comment line to your action template. An action template applies only to actions created on your computer.

To create an action template:

Create a text file containing the comments, function calls, and other statements that you want to include in your action template. The text file must be in the structure and format used in the Expert View.
Save the text file as ActionTemplate.mst in your <QuickTest Installation Folder>\dat folder. All new actions you create contain the script lines from the action template.

Note: Only the file name ActionTemplate.mst is recognized as an action template.

'***************************************************************

Sample Action Template
'########################################################
' Objective            :     The objective of the testcase
' Test Case           :     Test Case Name
' Author                :     Author Name
' Date Created       :     XX/XX/XXXX (mm/dd/yyyyy)
' Date Updated      :     XX/XX/XXXX (mm/dd/yyyyy)
'Updated by          :   
'########################################################

'##############Initialize Variables and Load Libraries##################

'-----------Write Statements to initialize Variable and to execute libraries

'#####################
Driver Script ##########################


'-----------Write the main Script here


'########################################################

'############## Report Generation & Memory Cleanup ################

'-----------Write code to generate report and to cleanup memory of variables

'########################################################
'****************************************************************